Jenkins 2: Pipeline as Code
Over the last month, we tested the newest (and still sometime unstable) Jenkins version with a state-of-the-art development workflow in mind. It includes strong Github integration (i.e. with the Status API), Docker usage (for on-demand and versatile slaves) and user-friendly Jobs configuration and bootstrapping (i.e. build steps should be part of the code and focus on reusability).
Note : this blog post relate our Jenkins 2 experience as of the Alpha & beta release of the 2.0 version. Your mileage may vary with the release of the recent RC and the future stable version.
Jenkins 2.0
Do you remember when Jenkins was the way to go for building your CI environment ? Down the road, many other tools went into the CI / CD race, adding their own awesome feature and helping redefine what Continuous Integration means.
Compared to , say, Travis-CI, Jenkins lacks some major features like easy, builit-in integrations with other CI / CD / code quality tools, volatile & on-demand slave management or the ability to describe your job in a simple, versionned text file.
This is where Jenkins 2 comes, bringing “Pipeline as code, a new setup experience and other UI improvements” mainly to the job configuration pages. Sticking to the Jenkins philosophy, the new Jenkins verison if fully compatible with older jobs & plugins. This is, as stated in the release announcement, a “drop-in replacement” for Jenkins 1.x and you don’t have to worry about existing configuration.
The killer feature is the ability for a developer to provide the build steps from a text file (a “Jenkinsfile”), exactly like a .travis.yml file with a touch of Groovy. Take this example :
node { // The "node" directive tells Jenkins to run commands on the same slave.
    checkout scm

    stage 'test'
    sh 'make test'

    stage 'publish'
    sh 'make publish'
}
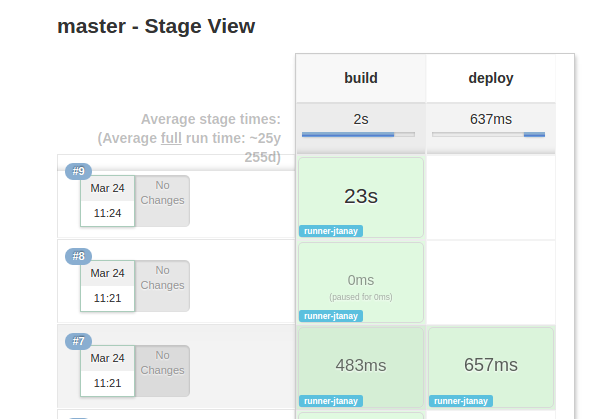
Simple, right ? I’ve just declared 2 build steps, “test” and “publish” both using the sh directive to launch my test/build scripts (and a Makefile under the hood, for brevity). Such stages are stored in Jenkins. They are logged, timed and replayable anytime one-by-one or by group.
The available documentation contains a great tutorial to get started with the Groovy DSL used by Jenkins. Many plugins developers already have ported their code to be usable from a Jenkinsfile and the list of Pipeline-compatible plugins is growing quickly.
These directives can easily be extended with your own scripts (check out the dedicated docs - more on that later).
The rest of this article focuses on configuration decisions we made to achieve our workflow objectives.
Light, efficient GitHub workflow
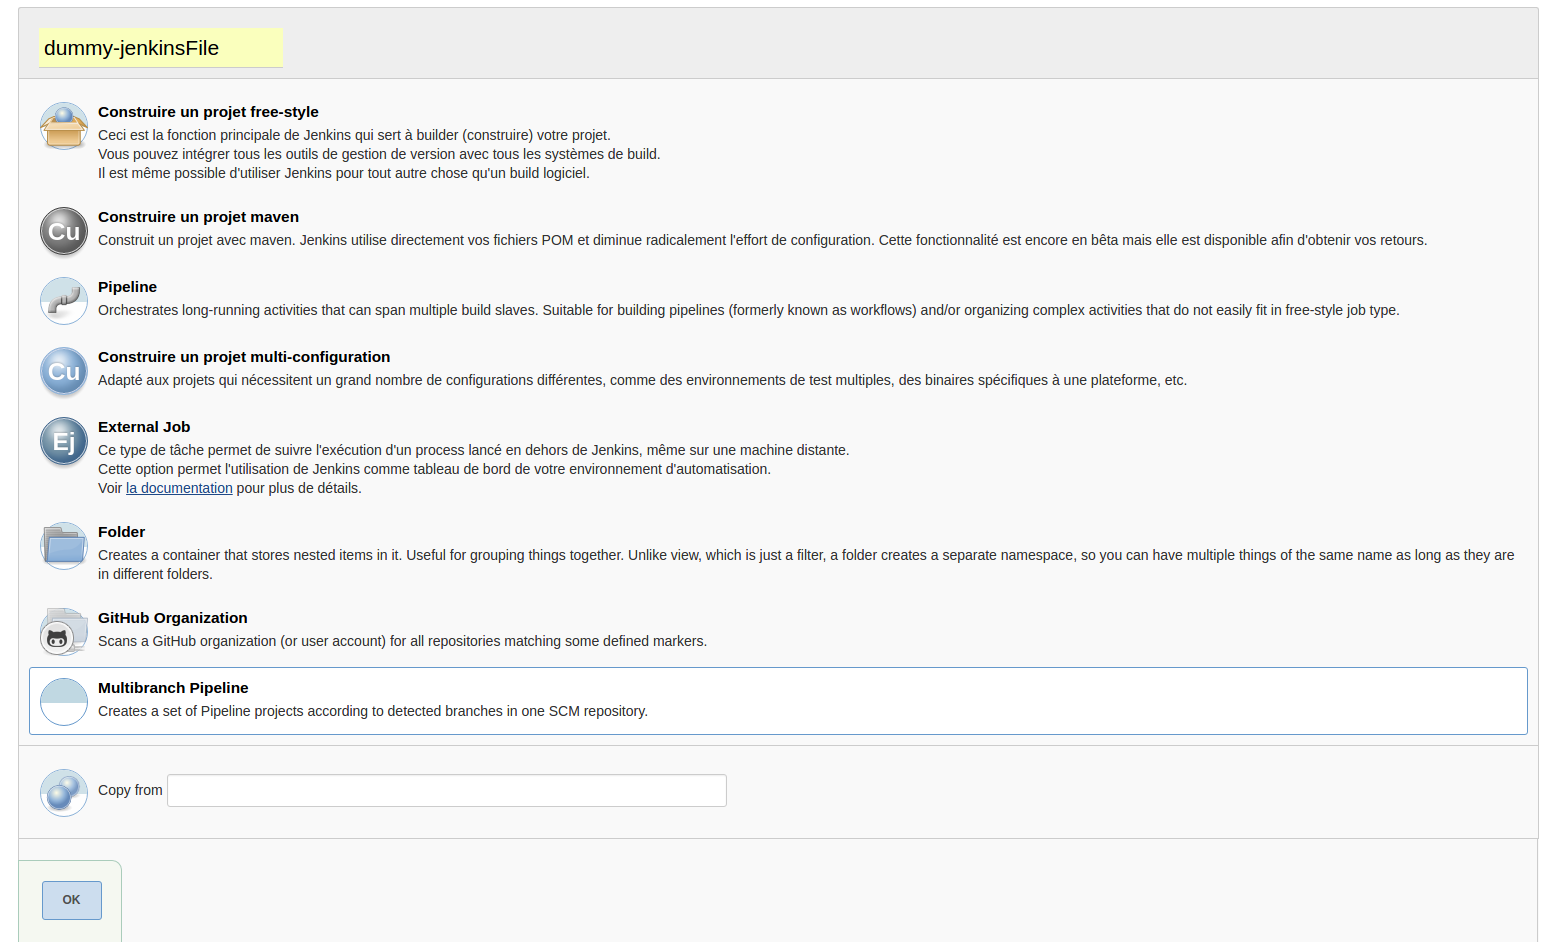
Ok, now for a hands on with this new version. After installing some smart plugins like the CloudBees GitHub Branch Source Plugin, we are able to create a “folder” project (“Multibranch Pipeline Job”) based on any repository in your GitHub organisation.
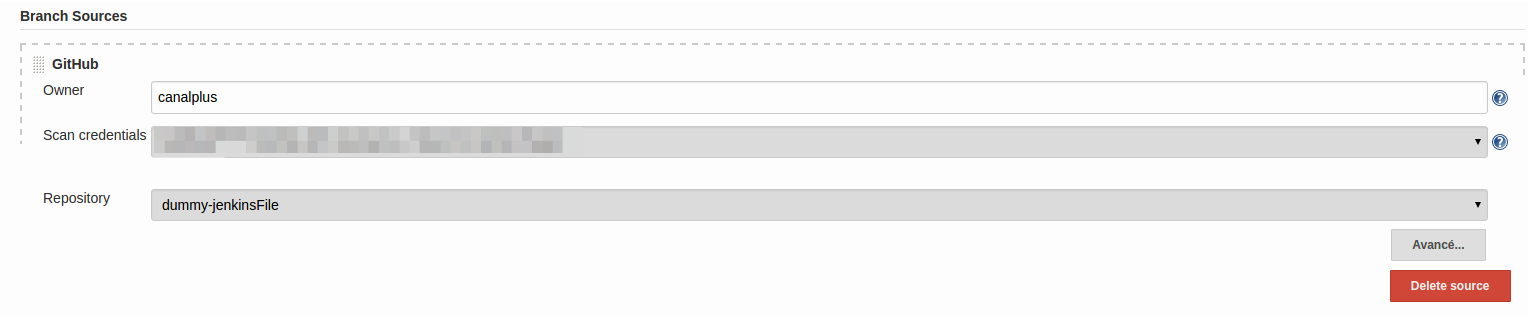
Note : Jenkins will need valid credentials to access your organization’s private repositories. I strongly suggest you to use a Github Machine User for Jenkins <-> GitHub integration.
After configuring the plugin so Jenkins use the Github Commit Status API to check ever commit/branches/PR of our repositories, it’s time to see it in action.
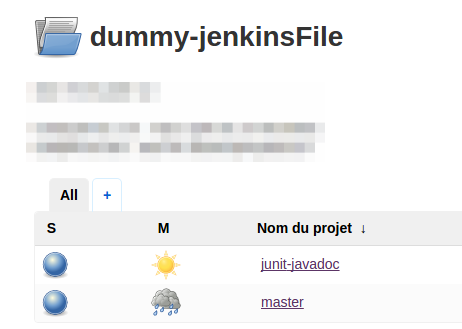
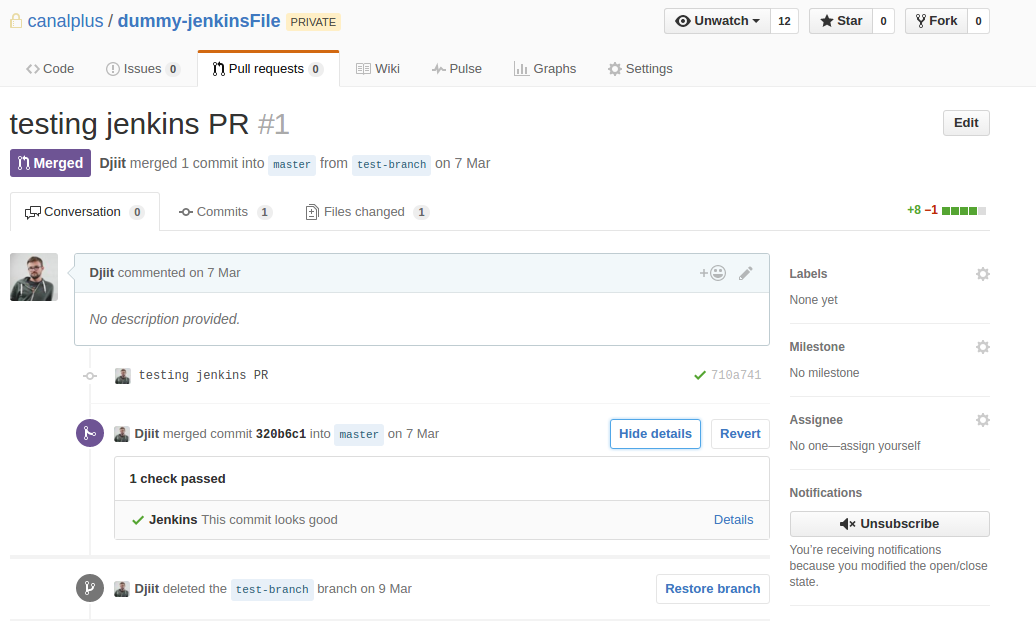
Let’s create a branch to work on a new feature. Jenkins will automagically detect this new branch, create a job based on the Jenkinsfile it find inside the tree. The same behavior applies for the PR created on GitHub. If I want to, I can edit the Jenkinsfile for this new branch only, without breaking the build for other branches.
Additionally, if you delete the branch (i.e. after a successful merge), Jenkins will simply delete the branch-related job.
On the GitHub side, Jenkins now checks our work and tell us if it’s good or not - like Travis-CI would do. We’re close to our ideal CI workflow!
Let it be Dockerized
Now that we have good GitHub integration, let’s push our CI workflow forward with Docker. Thanks to the CloudBees Docker Pipeline Plugin (and its great user guide), we can easily tell Jenkins to use a Docker image (either pull or build one from a versionned Dockerfile) to handle a job. Let us slightly change our first job definition :
node('docker') { // I want a slave labeled "Docker" (i.e. with Docker installed)
    docker.image('python:latest').inside { // Let's use the latest Python image
        checkout scm // Run the job normally...

        stage 'test'
        sh 'make test'

        stage 'publish'
        sh 'make publish'
    }
}
What’s happening here ? Well, docker.image('python:latest').inside tells docker to instanciate a container with the python:latest image and mount the workspace inside it! Note that if all your nodes have Docker installed, you can omit the node directive, as all the job will be run in one container.
Going further, if you want to test your code with multiple version of a Docker image, simply create a branch, change the version in the Jenkinsfile, and that’s it. You can even parameterize the version tag in Jenkins for run-time changes!
Note: You can use this Docker logic with old jobs with the CloudBees Docker Custom Build Environment Plugin.
Wrapping it up
I definetely suggest you to test the newest version of Jenkins. This is making Jenkins a real, state-of-the-art competitor again in the CI/CD competition. It’s your good ol’ tools, but under steroids.
We achieved a clean workflow with ease in days rather than weeks. We don’t go often on the Jenkins UI anymore, since all the logic is in the repository. We gave back developer the power of CI. It’s our code, our build directives.
Have anything to say ? Please tell us in the comments or tweet us !

Leave a Comment